Understanding B62 Forged Steel Valve Installation for Reliable Performance
You need to install a b62 forged steel valve with care to achieve the best performance and reliability. Always use clean tools and keep the valve free from dirt. Make sure you follow the correct steps to protect both the system and those who use it.
Proper installation keeps your equipment safe and working longer.
Key Takeaways
Get your workspace ready and keep valves in dry spots. Check valves for damage before you put them in.
Put the valve in the right way by following the flow arrow. Use the right tools so you do not cause leaks or break anything.
Wear safety gear that fits. Make sure the system is off and has no pressure before you start.
After you put in the valve, test it to find leaks or problems early. Write down all checks and repairs you do.
Look at the valve often, clean it, and add lubricant. This helps the valve work well and last longer.
B62 Forged Steel Valve Overview

Key Features
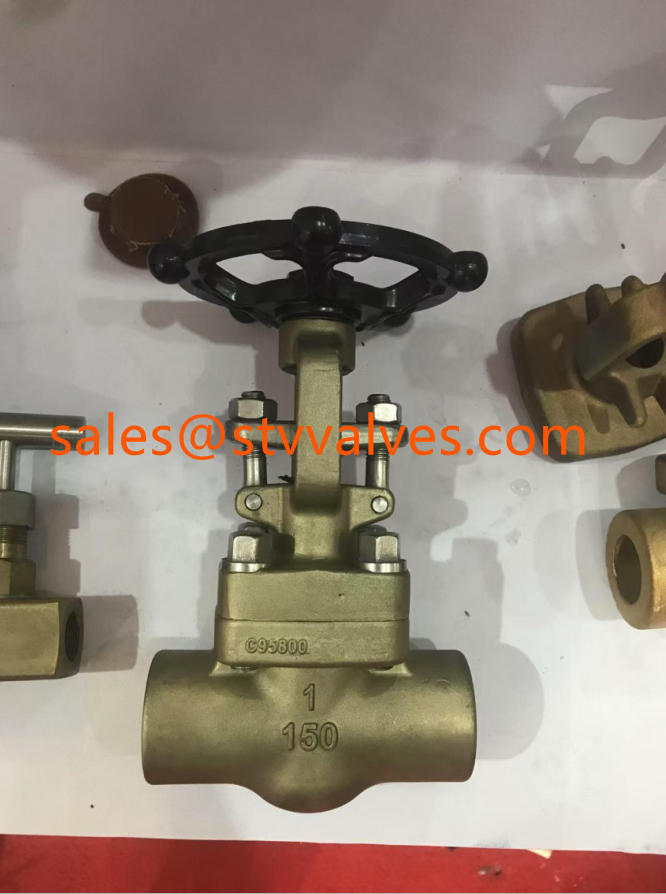
A b62 forged steel valve is made for hard work. The valve body is made from aluminum bronze ASTM B62. This material helps stop rust and damage from chemicals. The valve has a dual plate wafer check valve design. It uses spring-loaded dual plates to control flow and stop backflow. The pin structure is tight, which makes the valve stronger.
These forged steel valves follow rules like API 594, API 6D, ASME B16.5, DIN 3202, and NACE MR-01-75. Many api certified valves are fire-safe. This means they help protect your system in emergencies. The wafer design is small, so it fits in tight spaces. These valves work well in high-pressure systems and tough places.
Tip: Always look at the design and standards before you install a valve. This helps you pick the right one for your needs.
Material composition: Aluminum bronze ASTM B62
Dual plate wafer check valve design
Spring-loaded dual plates for reliable sealing
Tightened pin structure for durability
Fire-safe design for added safety
Compliance with major industry standards
Superior corrosion resistance and mechanical strength
Applications
B62 forged steel valves are used in many industries. They can handle water, steam, hydrocarbons, and strong chemicals. You will see them in power plants, chemical factories, oil and gas, and water treatment plants. Their design is good for jobs that need strong rust protection and steady performance.
Here is a table showing common applications and the fluids controlled:
Industry | Typical Fluids Controlled |
|---|---|
Power Generation | Steam, water |
Chemical Processing | Corrosive chemicals (e.g., nitric acid, acetic acid) |
Oil and Gas | Hydrocarbons |
Water Treatment | Water |
Pharmaceutical | Various media in medicine and bio-product manufacturing |
Petrochemical Refineries | Crude oil, refined products |
HVAC Systems | Steam, water |
Cryogenic Applications | Liquefied natural gas (LNG) and other cryogenic fluids |
You can find these valves in heating systems, plumbing, and water pipes. They work best in lower-pressure jobs but can also handle tough places. More industries use forged steel valves as they want better safety and performance.
Comprehensive Guide to Preparation
You should get ready before you put in a B62 forged steel valve. Good planning helps stop problems and keeps your system safe.
Storage and Handling
You need to store valves the right way to stop rust. Always keep them in a dry place inside. Put end covers on the valve openings to keep out dust. Use desiccants like silica gel to soak up water in the air. This helps keep the area dry and stops rust from starting. Make sure air can move around the storage space. Good airflow keeps wet air from staying near the valves.
If you must keep valves outside, use covers that block rain and sun. Try to keep the temperature the same so water does not form on the steel. Water drops can make rust happen faster and hurt the valve. Check the valves often for rust or damage. Put on special coatings or use rust stoppers if needed, especially if the air is wet or salty.
Keep valves in a dry, cool place if you can
Use end covers and desiccants to keep out dust and water
Make sure air moves well and the temperature stays steady
Cover outdoor valves with strong, weather-proof covers
Look at valves often to find rust or damage
Use coatings to protect valves when needed
Tip: Check and care for your valves often. This helps you find problems early and makes your valves last longer.
Inspection and Compatibility
Look at the valve closely before you put it in. Check for damage, rust, or missing parts. Make sure the valve is right for your system. Check if the valve works with the fluid you will use. You also need to see if the valve can handle the pressure and heat in your system. Using the wrong valve can cause leaks or even break your system.
Read the data sheet from the maker for each valve. The sheet tells you how much pressure and heat the valve can take. Only use valves that meet or go above what your system needs. This step is very important for safe installation.
Note: Always check if the valve fits your system. The right valve keeps your system safe and working well.
Safety Precautions
PPE and System Shutdown
You need to keep yourself safe before installing a valve. Always wear the right PPE. This means safety goggles, gloves, and strong shoes. If it is loud, wear ear protection. Wear a helmet if things might fall.
Turn off the system before you start work. Make sure all the pressure is gone from the pipes. Use lockout and tagout steps to keep things safe. Never put in a valve when the system has pressure. This keeps you and your team safe from leaks or bursts.
Check the area where you will work. Make sure you have enough room to move. Keep your tools and parts neat. Good planning helps stop accidents.
Here is a table that lists important safety steps for B62 forged steel valve installation:
Safety Aspect | Critical Safety Precautions and Measures |
|---|---|
Installation Location | Put valves straight up, close to equipment, with space for repairs. |
Pressure Vessel Installation | Place valves above the liquid in the vapor area; use shut-off valves for dangerous fluids. |
Clogging Prevention | Use burst discs, check valves, or heat tracing to stop clogging or rust. |
Fluid Pressure Stability | Put valves where pressure stays steady, away from changes and dead spots. |
Support and Stability | Give the valve body strong support so it works safely. |
Tip: Always check that there is no pressure before you start. This easy step can stop bad injuries.
Manufacturer Guidelines
Always read the manufacturer’s instructions before you begin. Each B62 forged steel valve may need special steps. The manual tells you the right torque, tools, and tips for pressure. Follow these steps to avoid mistakes.
The guide also tells you how to handle the valve and what to do if you see leaks or damage. If you skip these steps, you could break the valve or hurt the system. Keep the manual close while you work.
Note: The manufacturer’s instructions help you install the valve safely and keep your system working right.
B62 Forged Steel Valve Installation Steps
Positioning and Orientation
It is important to put the b62 forged steel valve in the right spot. Always set the valve sideways, not up and down. Find the arrow on the valve body. The arrow shows which way the fluid should go. Line up the valve with this arrow. This helps the disc open and close the right way. The fluid pushes the disc open and stops it from going backward.
Do not put the valve straight up or down. Gravity can make the disc move wrong. This can cause the valve to work badly. If you put the valve in the wrong way, it might leak or break. The right position keeps your system safe and working well.
Tip: Check the arrow for flow before you tighten bolts. This easy check can stop big problems later.
Hand Threading and Tightening
Start with the b62 forged steel valve closed. This keeps dirt out when you add it to the pipe. Use your hands to screw the valve onto the pipe first. Hand threading stops you from messing up the threads. This keeps the valve and pipe safe.
After hand threading, use a wrench to make it tight. Do not use too much force. Too much force can crack the valve or bend the seal. Tighten the bolts in a crisscross way. This spreads the pressure and helps the ball valve fit right. Always use the torque numbers from the manual.
Note: Tightening too much is a common mistake. It can make leaks and shorten the life of your ball valve.
Valve Mounting and Connections
Follow good steps when you put in the valve and connect it. These steps help stop leaks and breaks:
Know what your system needs. Think about the fluid, heat, pressure, and rust risk.
Choose the right valve type and material for your job.
Get the area ready. Let out the pressure, clean the pipes, and line things up.
Put in the valve with care. Follow the arrow, line up the valve, use good gaskets, and tighten bolts to the right number.
Test the valve after you put it in. Open and close the ball valve to see if it moves well and does not leak.
Plan for repairs. Add shut-off valves and extra lines near the b62 forged steel valve. These let you fix or check the valve without stopping everything.
Adding shut-off valves and extra lines makes repairs safer and easier. Extra lines between both sides of big valves lower the pressure difference. This makes opening and closing easier and stops wear on the gate and seal. It also helps the valve last longer and keeps it safe. Safety valves or extra lines can control sudden pressure changes and protect your equipment.
Callout: For systems that need double block and bleed, use two ball valves with a bleed valve in the middle. This lets you check for leaks and safely close off parts of the pipe.
The strong valve body and tight seal of the b62 forged steel valve help stop leaks. Always use good gaskets and check the line-up when you put it in. Good pipe work and careful mounting keep your system running well.
Ball Valve Operation and Accessories
The b62 ball valve is easy to use and works well. You can pick how you want to open or close it. There are different ways to do this. Each way changes how you move the valve. You should learn about these choices before you start.
Handwheel and Operating Nut
You can use a handwheel to turn the b62 ball valve. The handwheel lets you open or close it by hand. This is good for small jobs or quick changes. An operating nut goes on top of the valve stem. You can use a wrench or tool to turn the nut. This gives you more power if the valve is stuck.
Tip: Turn the handwheel or nut slowly. If you turn too fast, you might break the valve or make it leak.
Some b62 ball valves have a handle you can lock. This keeps the valve open or closed. You can use a padlock for more safety. This stops people from changing the valve by mistake.
Extension Stems and Options
Sometimes the b62 ball valve is hard to reach. Extension stems help you use the valve from far away. You can put these on the valve stem. This makes it easy to open or close the valve from another spot.
There are other things you can add to help. Here is a table with some choices:
Accessory | Use Case |
|---|---|
Locking Device | Stops the valve from moving by accident |
Position Indicator | Shows if the valve is open or closed |
Gear Operator | Makes it easier to turn big ball valves |
Pneumatic Actuator | Lets you use air to open or close the valve |
Electric Actuator | Lets you use electricity to move the valve |
You can pick manual or automatic ways to use your b62 ball valve. Automatic ways use electric or air-powered parts. These let you control the valve from a control room or with a button. You should choose the right things for your system and safety.
Note: Always make sure the accessories fit your b62 ball valve before you put them on.
Common Mistakes to Avoid
When you install a B62 forged steel valve, you need to watch out for some common mistakes. These errors can lead to leaks, damage, or unsafe systems. If you avoid these problems, your valve will last longer and work better.
Over-Tightening
You might think that making bolts extra tight will stop leaks. In fact, over-tightening can crack the valve body or damage the gasket. This mistake often leads to leaks or even breaks the valve. Always use a torque wrench and follow the numbers in the manual. Tighten bolts in a crisscross pattern. This spreads the force and keeps the valve safe.
Tip: If you feel strong resistance before reaching the recommended torque, stop and check for cross-threading.
Contamination and Cleanliness
Dirt, dust, or small metal pieces can get inside the valve during installation. These particles can scratch the sealing surfaces or block the valve from closing. You should always clean the pipes and valve before you start. Use clean gloves and tools. Keep the valve covered until you are ready to install it. Even a small bit of dirt can cause big problems later.
Here is a simple checklist to help you keep things clean:
Wipe down all parts before assembly
Use clean, lint-free cloths
Check for debris inside the valve and pipes
Skipping Pressure Tests
You need to test the valve after installation. Skipping this step is a big mistake. Pressure tests help you find leaks or weak spots before you use the system. If you do not test, you might miss a problem that could cause a failure under pressure. Always follow the manufacturer's steps for pressure testing. Record your results for future checks.
Note: Pressure tests protect your system and help you catch problems early.
Troubleshooting and Maintenance
Leak Detection
You need to check for leaks often to keep your B62 forged steel valve working well. Leaks can waste fluid and lower system pressure. You can spot leaks by looking for wet spots, drips, or stains around the valve and pipe joints. Listen for hissing sounds, which can mean gas or air is escaping. Use a leak detection spray or soapy water on the joints. Bubbles will show you where leaks are hiding.
Tip: Always check for leaks after you install or repair a valve. Early detection helps you fix problems before they get worse.
If you find a leak, tighten the bolts to the correct torque. Replace damaged gaskets or seals. If the leak does not stop, you may need to replace the valve.
Lubrication and Cleaning
Lubrication keeps the valve moving smoothly. You should use the lubricant recommended by the manufacturer. Apply it to the stem and moving parts. Do not use too much. Extra lubricant can attract dust and dirt.
Cleaning is just as important. Wipe the valve body and handle with a clean, dry cloth. Remove any dirt, dust, or buildup. For tough spots, use a soft brush. Never use harsh chemicals unless the manufacturer says it is safe.
Here is a simple checklist for valve care:
Lubricate moving parts as needed
Wipe down the valve regularly
Remove buildup from the stem and handle
Inspection Schedule
You should inspect your B62 forged steel valve on a regular schedule. Check the valve every month in busy systems. For less-used valves, inspect them every three to six months. Look for leaks, rust, or signs of wear.
Inspection Task | Frequency |
|---|---|
Leak check | Monthly |
Lubrication | Every 3 months |
Cleaning | Monthly |
Full inspection | Every 6 months |
Note: Always follow the manufacturer’s operation and maintenance manual. The manual gives you the best advice for your specific valve.
Regular checks help you catch problems early. This keeps your system safe and running smoothly.
Verifying Reliable Performance
Functional Testing
After you put in your B62 forged steel valve, you need to check it. Testing shows if the valve works right. First, open and close the valve a few times. Watch how it moves and listen for odd sounds. If it feels stuck or makes noise, you might need to fix it.
Use a pressure gauge to check the system before and after the valve. If the pressure drops, there could be a leak. You can test the valve with water or air like you use in your system. If you see bubbles or drips, the valve might not seal well.
Here is a simple checklist for testing:
Open and close the valve all the way
Look for leaks at every joint
Listen for hissing or grinding sounds
Check the pressure before and after the valve
Make sure the valve seals tight
Tip: Always test the valve with the same fluid and pressure as your system. This helps you get the best results.
Documentation
You should write down every test and check you do. Good records help you see if there are problems early. Write the date, what test you did, and what happened. Add any repairs or changes you made.
Use a table to keep your records neat. This helps you find what you need later.
Date | Test Type | Result | Action Taken |
|---|---|---|---|
2024-06-01 | Pressure Test | Passed | None |
2024-06-15 | Leak Inspection | Small Leak | Tightened bolts |
2024-07-01 | Functional Check | Smooth | Lubricated stem |
You can use a notebook or a computer file. Always update your records after each test. Good records show your valve is safe and help your system work well.
Note: Keeping good records makes it easier to fix problems and plan for future care.
You can make your B62 forged steel valve work well by doing these things:
Get your workspace ready and look at the valve first.
Install the valve safely every time.
Test the valve often and keep it in good shape.
Always read the manufacturer’s manual for more info. If you have hard problems, talk to an expert. For extra help, check guides about fixing and caring for valves.
FAQ
How do you know if a B62 forged steel valve fits your system?
Check the valve’s size, pressure rating, and material. Read the manufacturer’s data sheet. Make sure the valve matches your fluid type and temperature. If you have doubts, ask an expert.
What tools do you need for installation?
You need a torque wrench, clean gloves, and a soft cloth. Use a handwheel or operating nut for the valve. Always follow the manufacturer’s tool list for best results.
How often should you inspect the valve?
Inspect the valve every month if you use it often. For less-used valves, check every three to six months. Look for leaks, rust, or wear. Keep a record of each inspection.
Can you install the valve in any position?
No, you must follow the flow arrow on the valve body. Install the valve sideways, not straight up or down. This helps the disc work right and stops leaks.
What should you do if you find a leak?
Tighten the bolts to the correct torque. Replace damaged gaskets or seals. If the leak continues, you may need to change the valve. Always test after repairs.


评论
发表评论